Nano Banana, step by step
This page follows one real model, a supercar, from the first Nano Banana picture to the car in the engine, with the exact prompts we used and every check we run. Use the same steps for anything you build: a car, a building, a room, a prop or a character.
What Nano Banana is, and where it fits
Nano Banana is Google's image model. You use it in Google Flow or the Gemini app, not inside Arcwright: Arcwright doesn't make pictures. You make the pictures there, save them, and bring them into your project, where the engine and your AI use them as the plan for every model.
A picture tells you what a thing should look like. It's the target. Everything you build is checked against it, side by side, so you never have to guess.
- One picture per job. A design picture says what it looks like. Views say its shape from each side. Clay, depth and normal pictures say how the surface bends. Close-ups say how the small parts are made.
- Always edit, don't start over. Once you have a picture you like, every next picture is an edit of it, with it attached, so it stays the same thing.
- Check every picture before you use it. Count the parts, check both sides match, zoom in. A picture with a mistake becomes a model with a mistake.
Step 1: the design picture
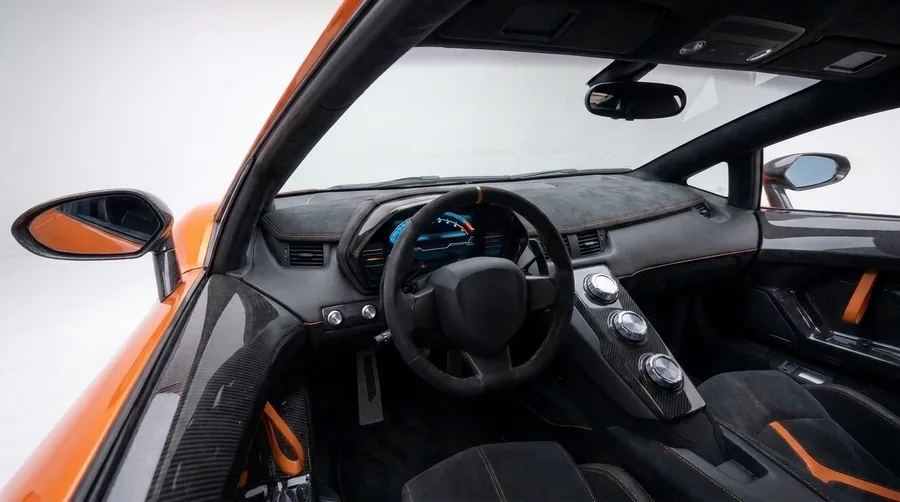
Start with one picture of the whole thing at a three-quarter angle, in a plain studio with soft light, so the shape is easy to read. Ask for a plain backdrop and no text. Then improve it one change at a time, with the last picture attached each time: "Keep everything exactly the same. Only change the side air intake to a deep channel." One change per edit means nothing else drifts.
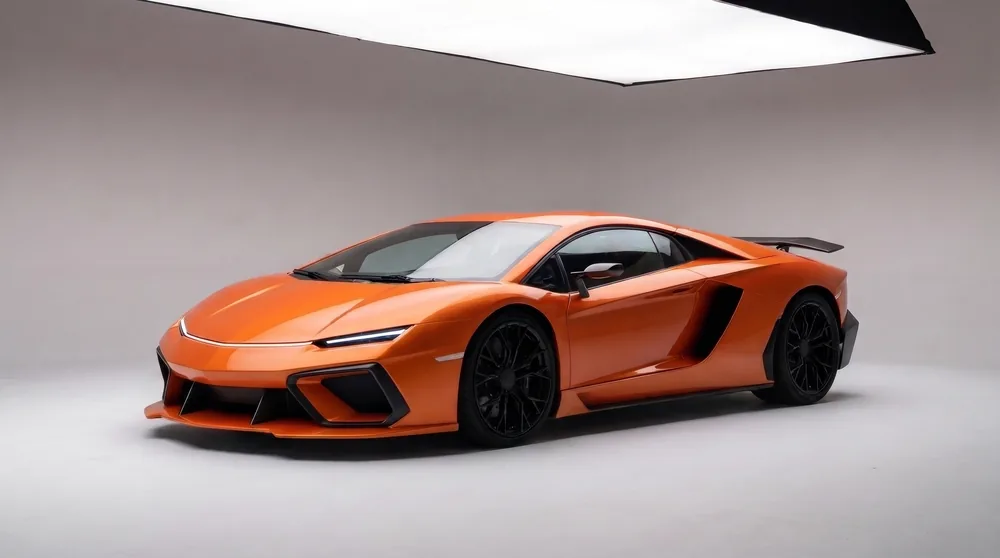
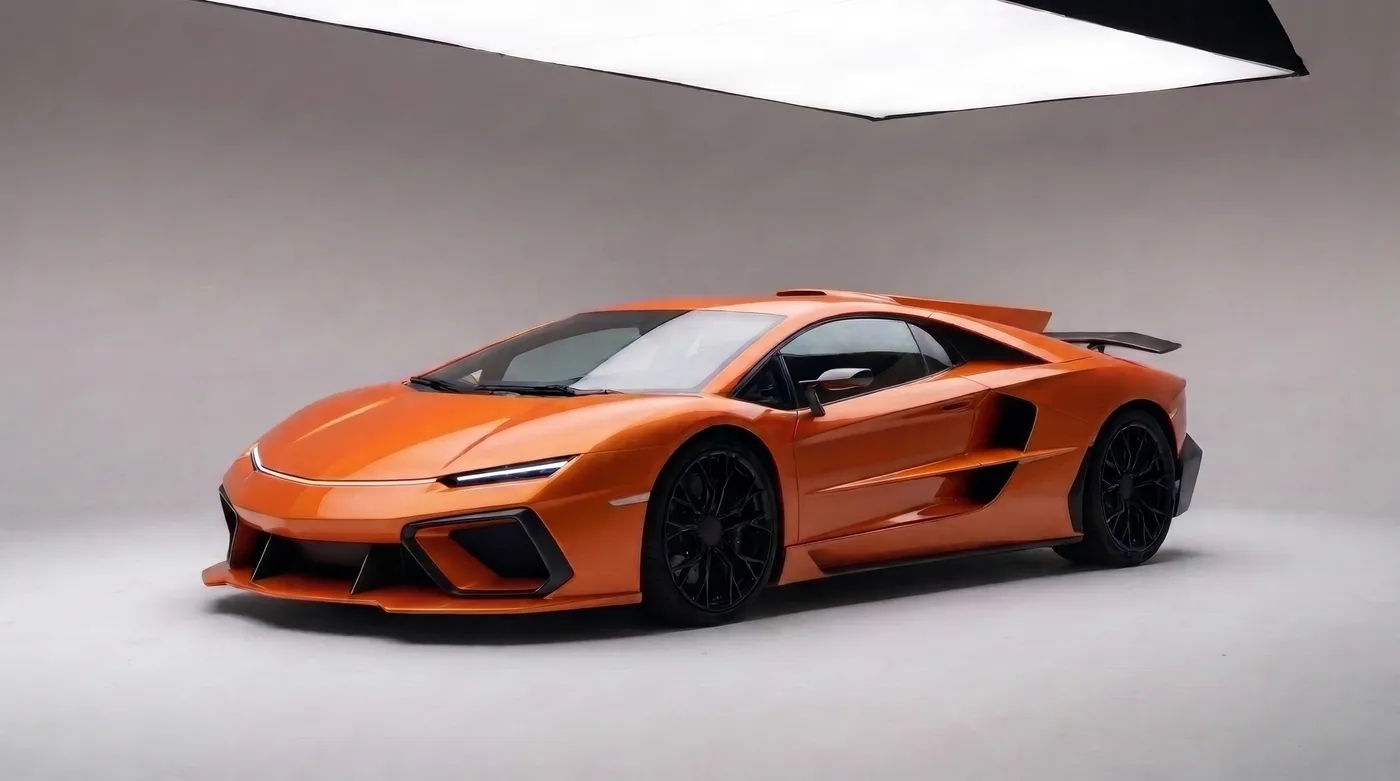
Make the design your own. If a picture comes out looking like a car, a character or a logo that already exists, change it feature by feature until it doesn't. Zoom into every picture for badges, logos and writing, and edit them out (our number plates are left blank).
Step 2: the same thing from every side
Next, make the views: the rear three-quarter, then straight side, front, rear and top. Each one is an edit with the design picture attached, and the views you already have attached too, so it's always this exact car, not a new one.
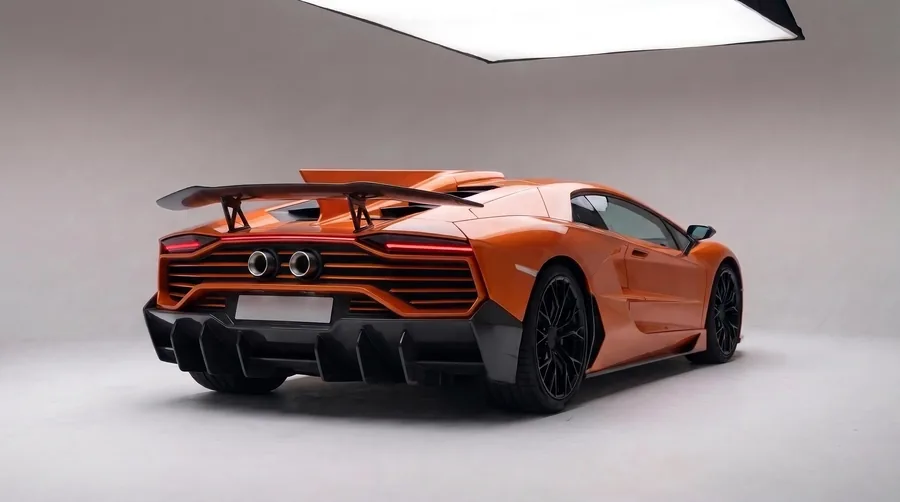
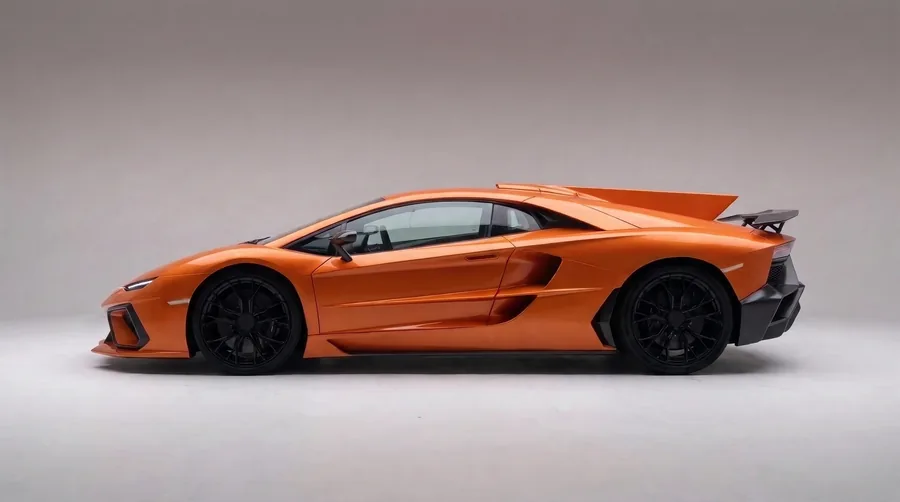
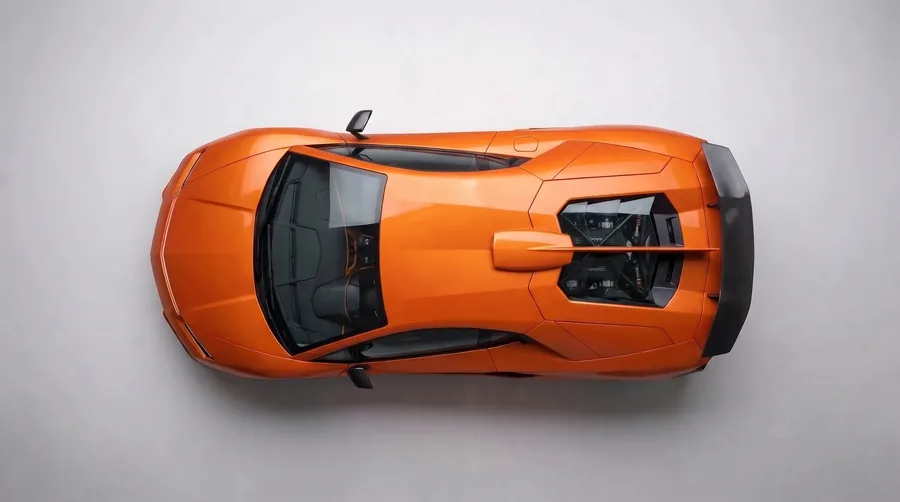
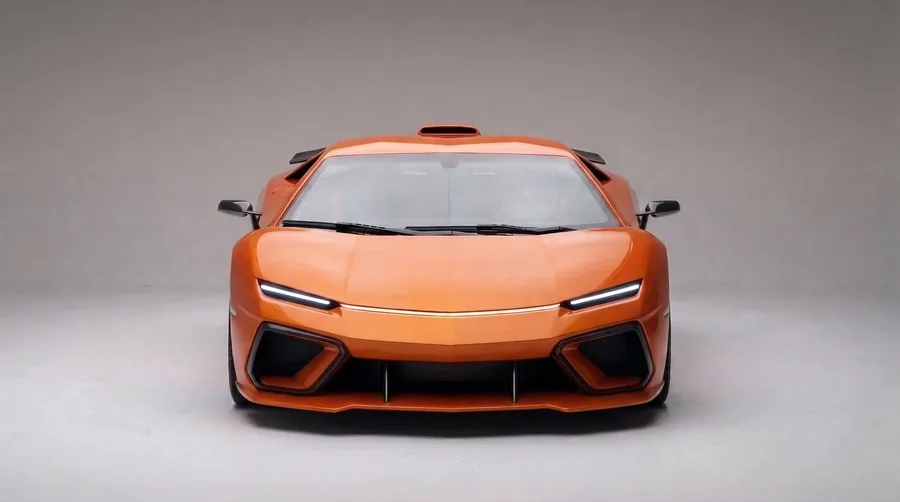
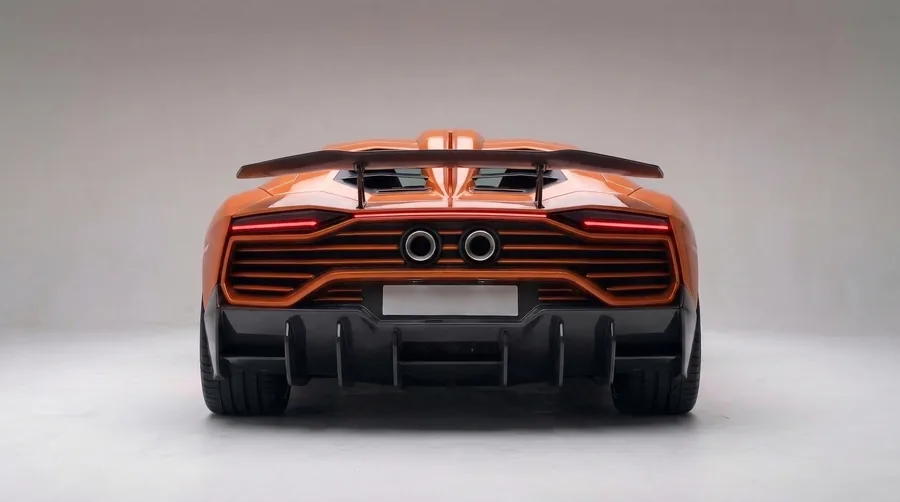
Be honest about the views. AI views never agree perfectly: our front view came out a little wider than the top view says it should be. Pick which views are the truth (for a car, the side and the top) and scale the others to match. The engine's blueprint planes (Step 5) show you where they disagree.
Step 3: clay, depth and normal pictures
A paint picture is full of reflections, which hide the shape. So for each view we make three technical pictures from it. Each is an edit of that exact view, with the other views attached, asking for the same framing so it lines up pixel for pixel. Make two of each, keep the better one, and lay it over the view to check the outline sits within a few pixels.
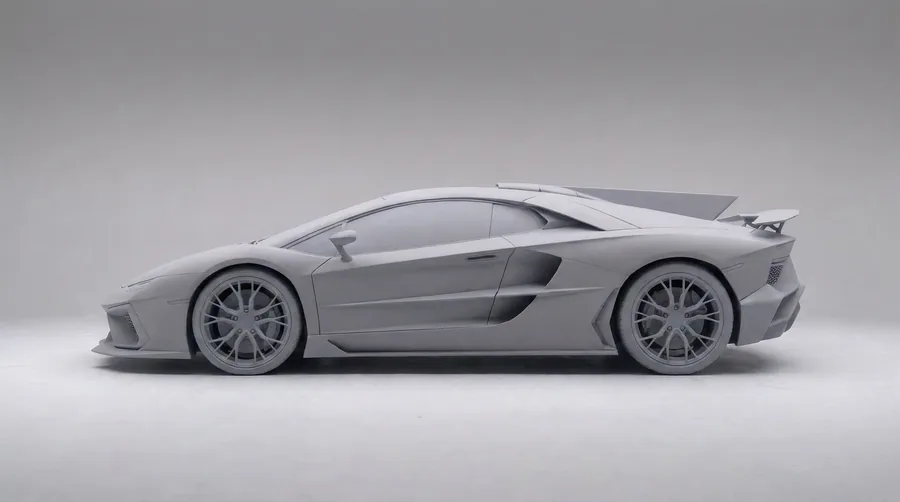
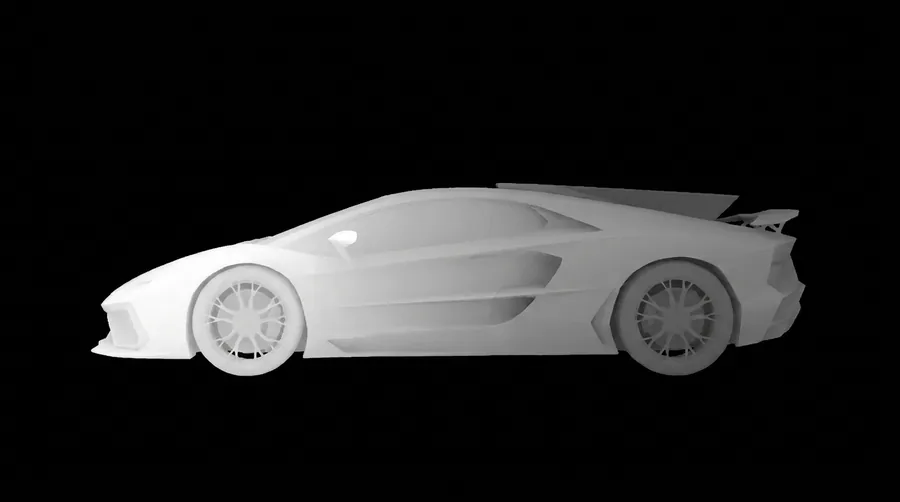
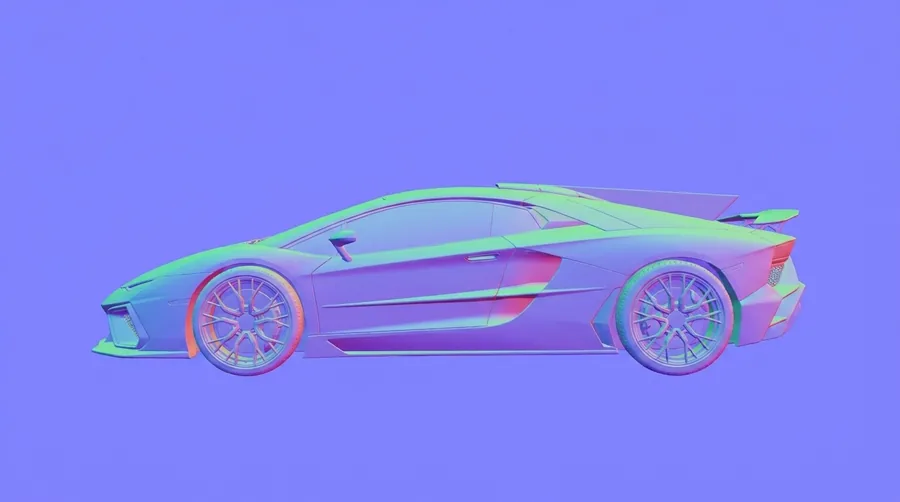
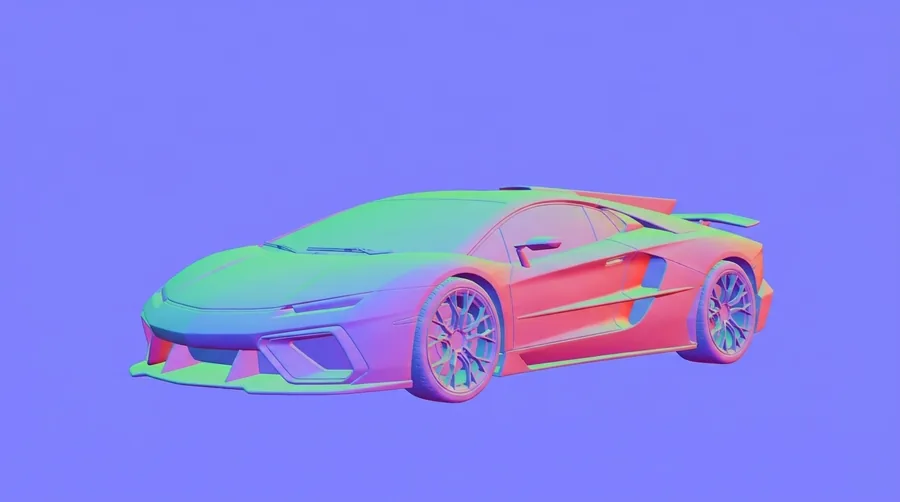
The exact prompts:
| Clay | "The exact same image, same camera, same car, same outline, nothing moved: the whole car as one matte light-grey clay model under soft even studio light, no paint colour, no reflections, glass the same clay, wheels the same clay. Every crease, panel line, intake and vent kept crisp and exactly in place. Plain light backdrop. No text." |
| Depth | "Convert this exact image into a grayscale DEPTH MAP of the car, pixel-aligned with the input: same framing, same outline, nothing moved or redrawn. White = nearest to the camera, black = farthest, smooth continuous gradients over the body with sharp steps at real edges (intakes, panel steps, wing). No reflections, no shadows, no paint. Background pure black. No text." |
| Normals | "Convert this exact image into a surface NORMAL MAP of the car, pixel-aligned with the input: same framing, same car, same outline, nothing moved or redrawn. Standard tangent-free camera-space normal colours: surface facing the camera = (128,128,255) blue-violet, facing right = red up, facing up = green up. Treat the whole car as one smooth matte body: no paint colour, no reflections, no highlights, no shadows. Glass is shaded as the solid surface it is (ignore what is seen through it). Wheels included. Keep every crease, panel edge, intake and vent exactly where it is, crisp. Background flat (128,128,255). No text." |
Swap "car" for whatever you're making. The depth and normal pictures are what forge_from_views reads (Step 6), and the clay picture is what you compare your model's plain grey look against.
Step 4: close-ups of the details
Whole-object pictures are too small to show how a door edge is folded or how wide a panel gap is. So we make close-up sheets: four close-ups per picture, each with a black-and-white checker card held in frame. The card gives the real size: each square is a known size, so you can measure a gap or a lamp in the picture.
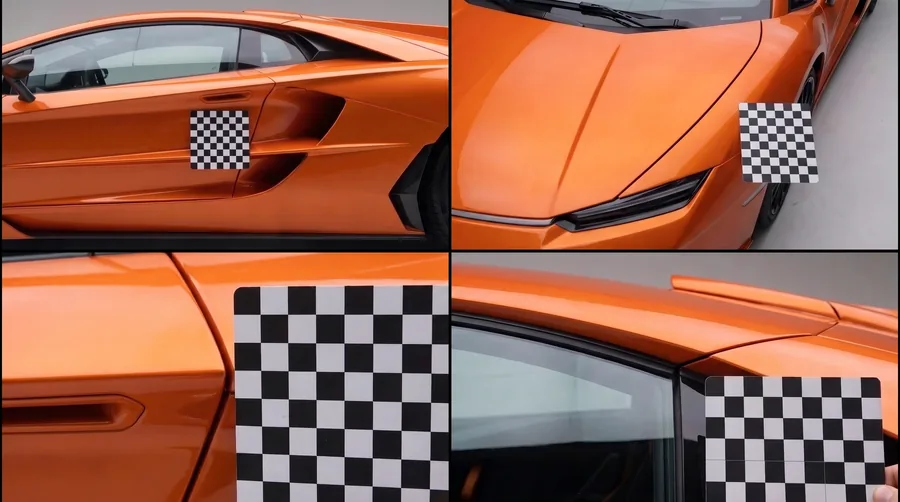
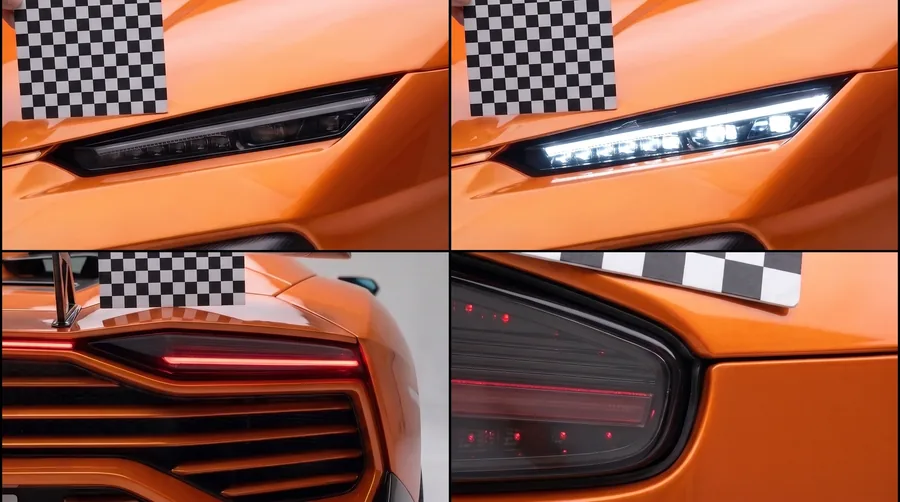
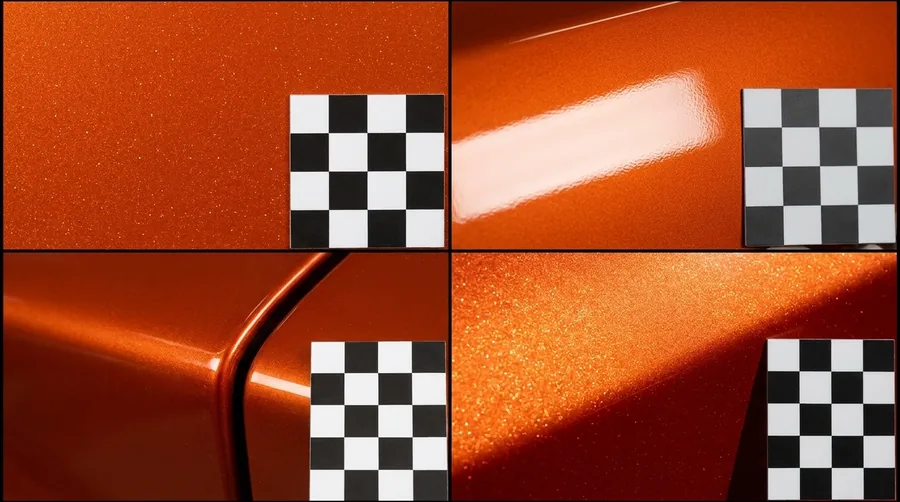
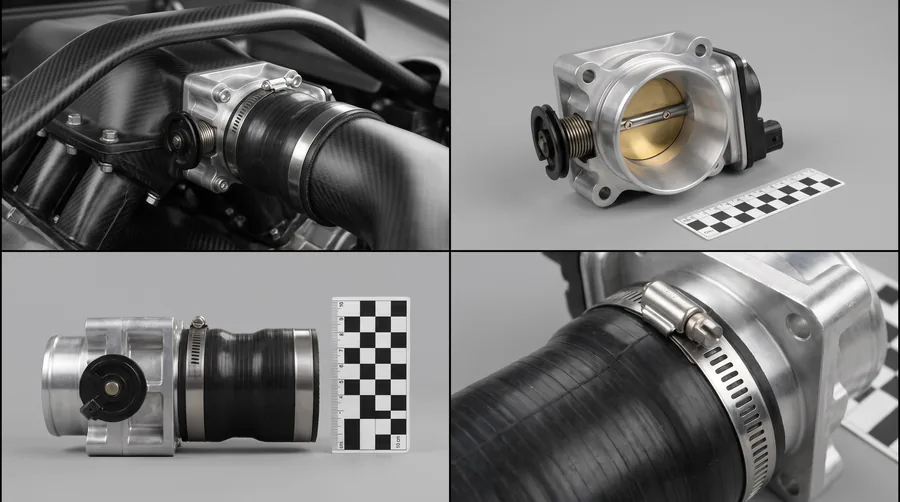
Keep a short list of what each sheet is for (which part it is the plan for). Then, when you build that part, you know which picture to put next to it.
Step 5: put the pictures in the engine
Save your pictures into your project under Assets/References/, one folder per subject. Your AI looks there first. You can also ask it to find real-world photos with find_reference (it searches Wikimedia Commons and shows you a contact sheet) and save the ones you pick with add_reference, which keeps where each came from and its license.
Blueprint planes
reference_planes stands your side, front, rear and top views around the model at true size, like the blueprints in a 3D modeling program. It cuts the subject out of its background and scales every view so one real size fixes them all (side and top by length, front and rear by height). Then it tells you where the pictures disagree. Each plane shows only from its own side, so it never blocks your view of the model.
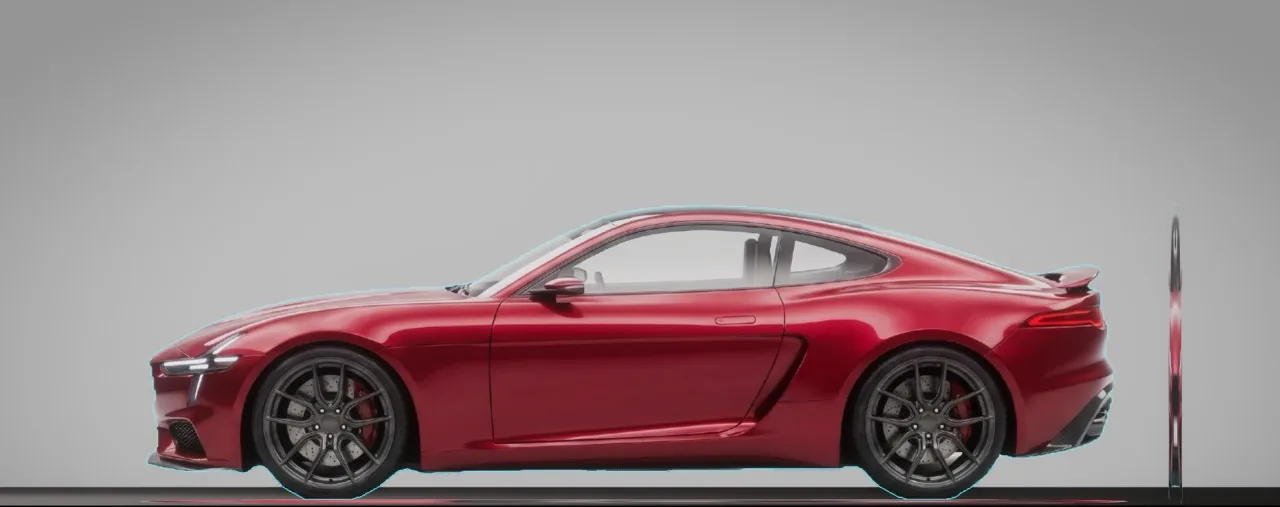
look: side). This is an earlier car, sportscar-01.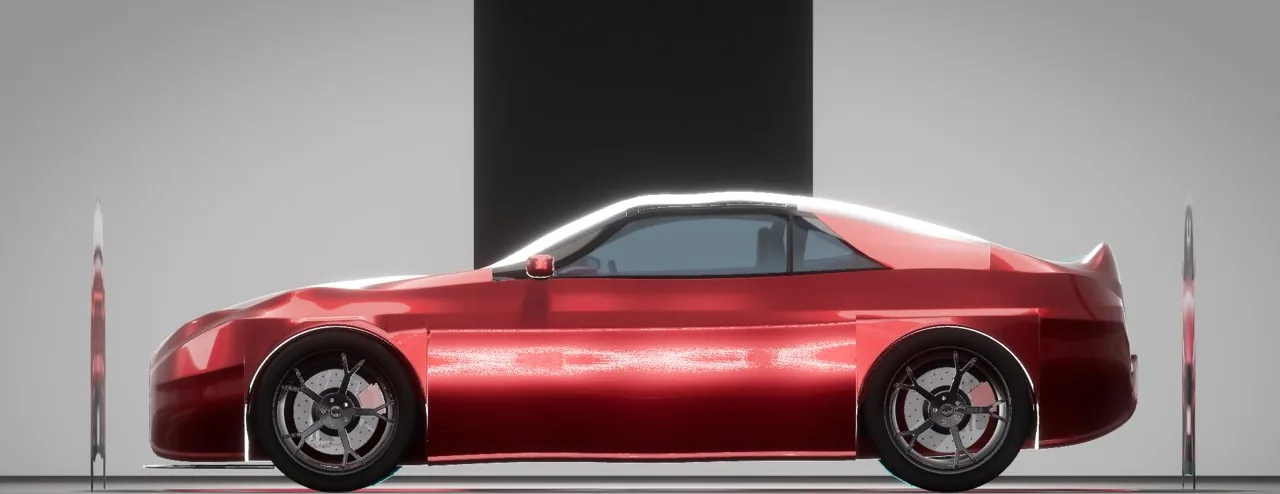
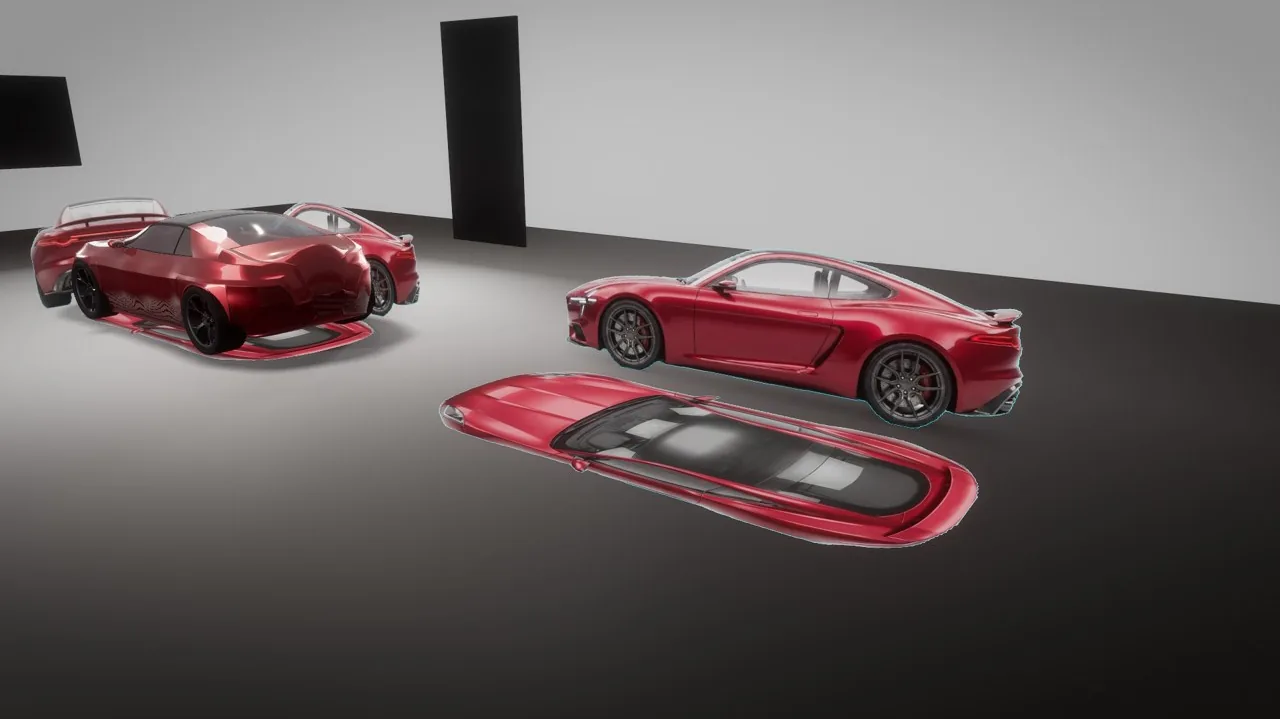
opacity, outline, placement (outside the model or through its centre), gap, flip, show/hide, and look (side, front, rear, top, or reset).Step 6: build the model against the pictures
There are three ways to build from your pictures. Pick by what you're making.
- Carve it from a sheet:
forge_from_viewscarves a solid model from your views (a 2×2 sheet of front, side, top and three-quarter on a magenta background, or a row). Give it the matchingnormalsanddepthpictures from Step 3, pixel-aligned, and it uses them to shape the surface between the outlines. Set the real size withdimension.forge_prepare_sheetturns loose pictures into a clean sheet first. - Fit a family:
forge_from_referencebuilds from a family it knows (cabinets, dressers, doors, pillows, cushions, cars) and refines it by rendering and comparing with your picture again and again. - Build it panel by panel: for a hero model like this car, every panel is built and placed by hand with the AI, checked against the views at each step.
car_labshows the curves the body is made from, with combs that show how each curve bends, and lets you drag a curve point and rebuild.
Then colour it: texture_from_views projects your view pictures onto the model (its hold_out option keeps one view back so you can check honestly), and photo_surface turns a flat picture of a material into a seamless surface. Never paste a picture onto a model as a sticker: shape the detail as real geometry and use the pictures as the plan.
Step 7: check it, the way we do
A model can look right from one angle and be wrong from another, so we check it three ways.
Side by side, same camera
Put the engine camera where the picture's camera was, and look at the two together. This is our car today, still being worked on.
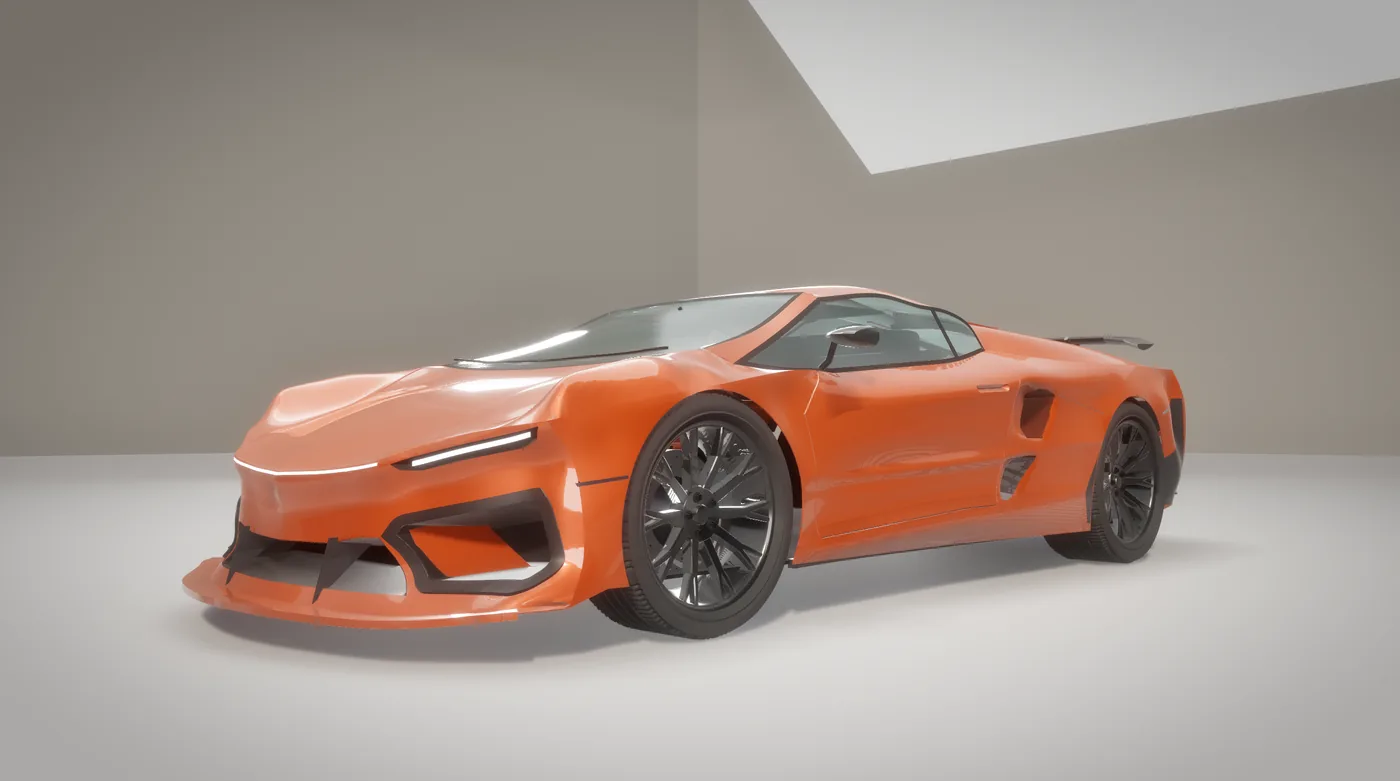
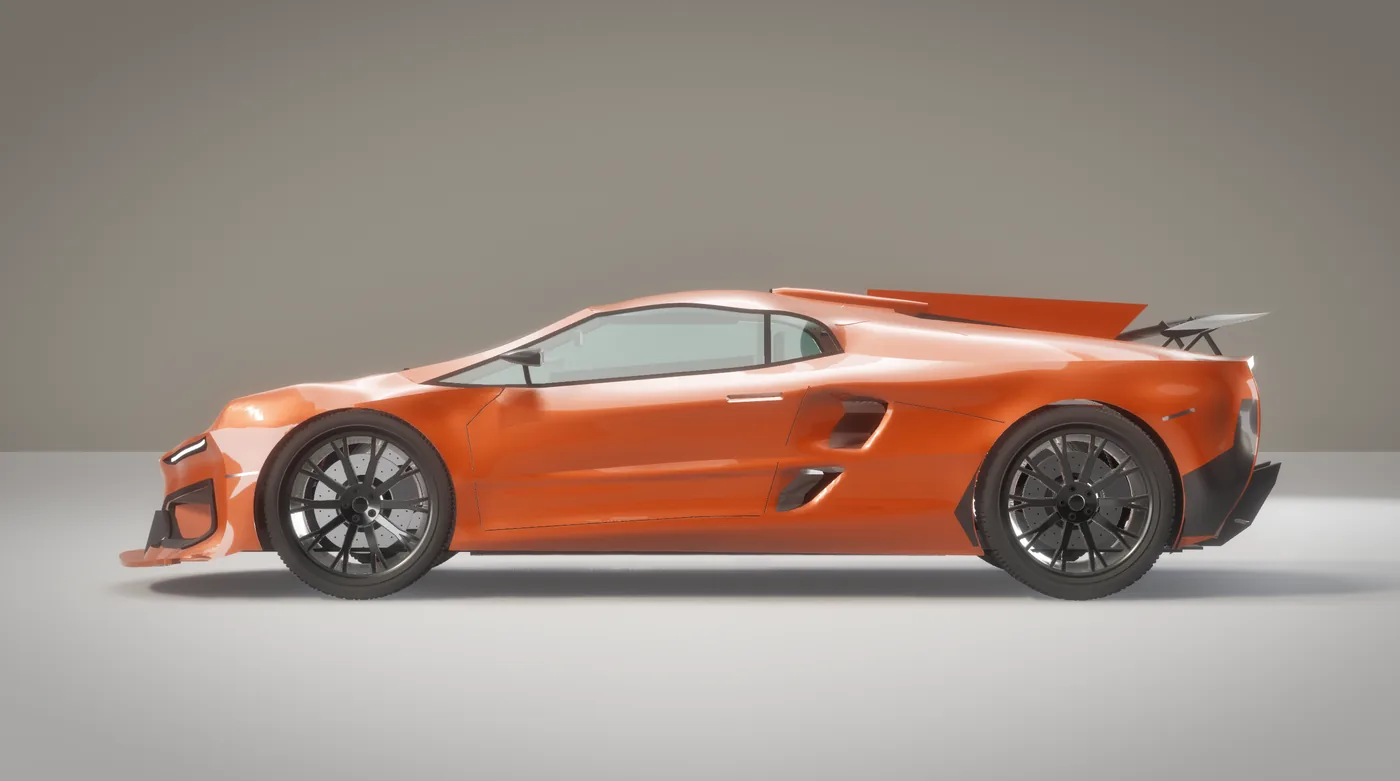
Honest notes on this one: the outline and the side intakes are close, the nose and the front fenders still need work, and the wheels are a different design for now. That's what the checks are for: they tell you exactly what to fix next.
Silhouettes
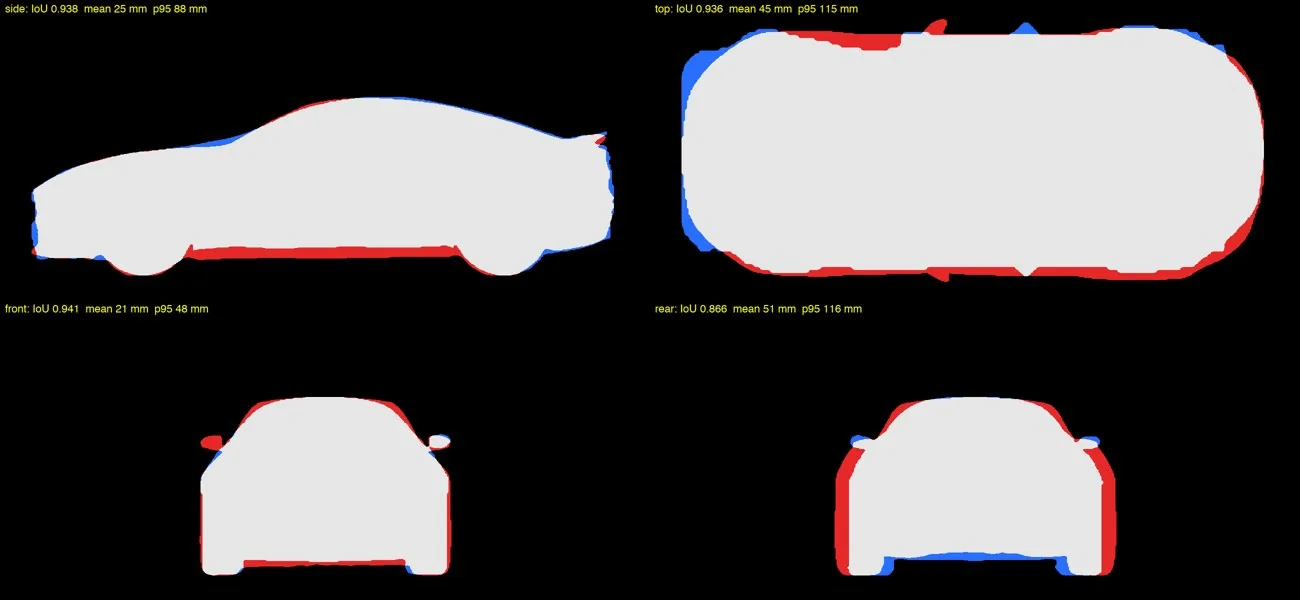
compare_reference fills one view of the picture to a solid shape and does the same for your model from the same direction, then lays them over each other. You get a match score and a picture: red is shape the picture has and your model doesn't, blue is shape your model has that the picture doesn't. It also says how many millimetres off each part is.
Zebra stripes
Car designers judge a surface by the reflections of long striped lights. Arcwright does the same: switch the view to zebra and every surface mirrors bands of light. On a smooth surface the bands flow in smooth curves. A dent, a ripple or a step between panels bends or breaks them. You'll see problems here you'd never see in the paint.
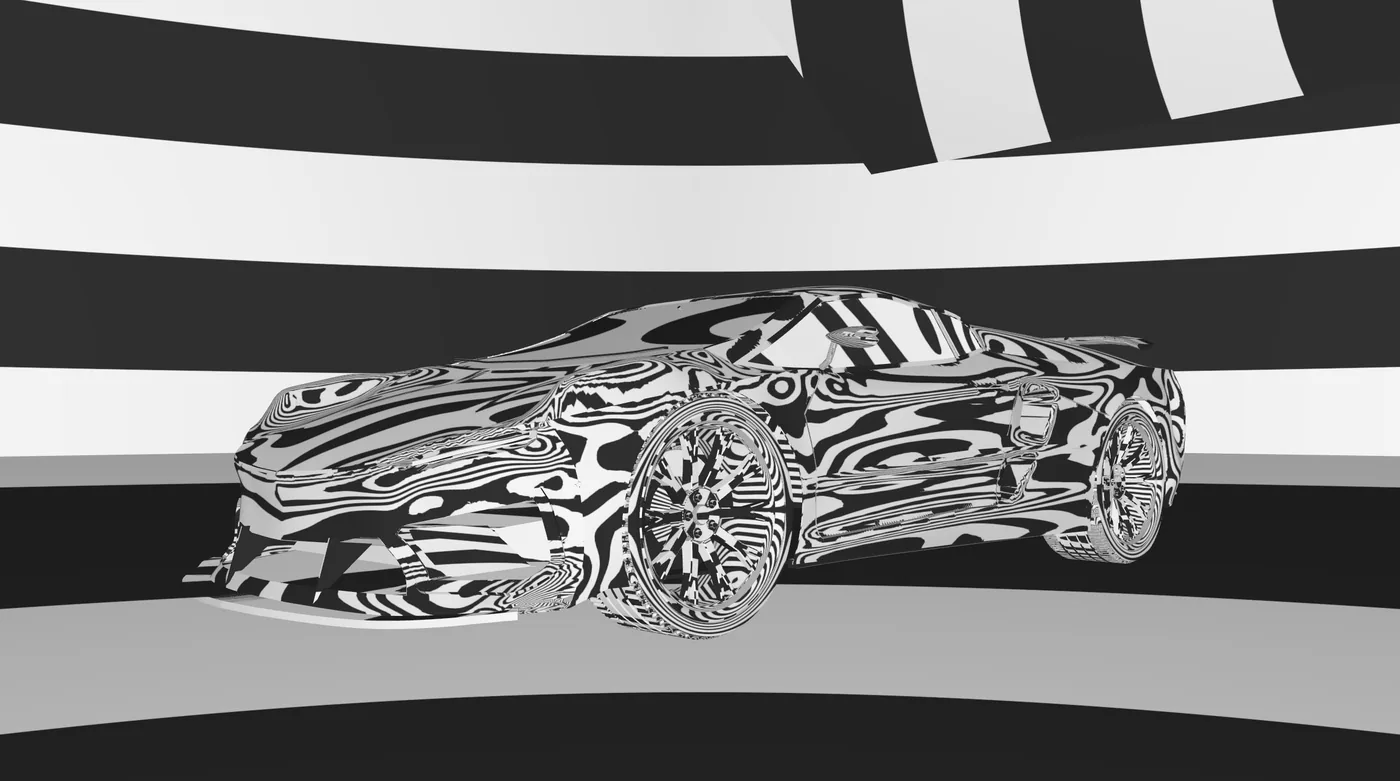
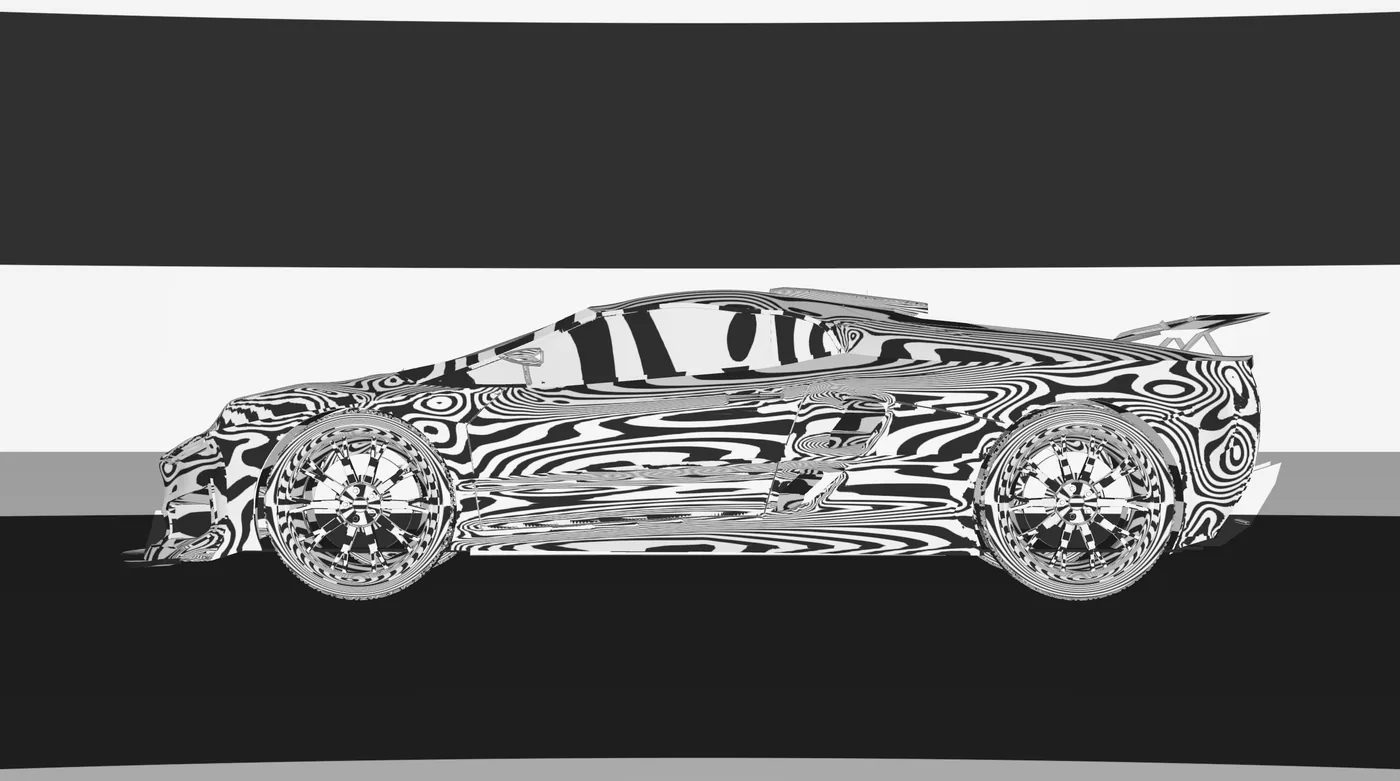
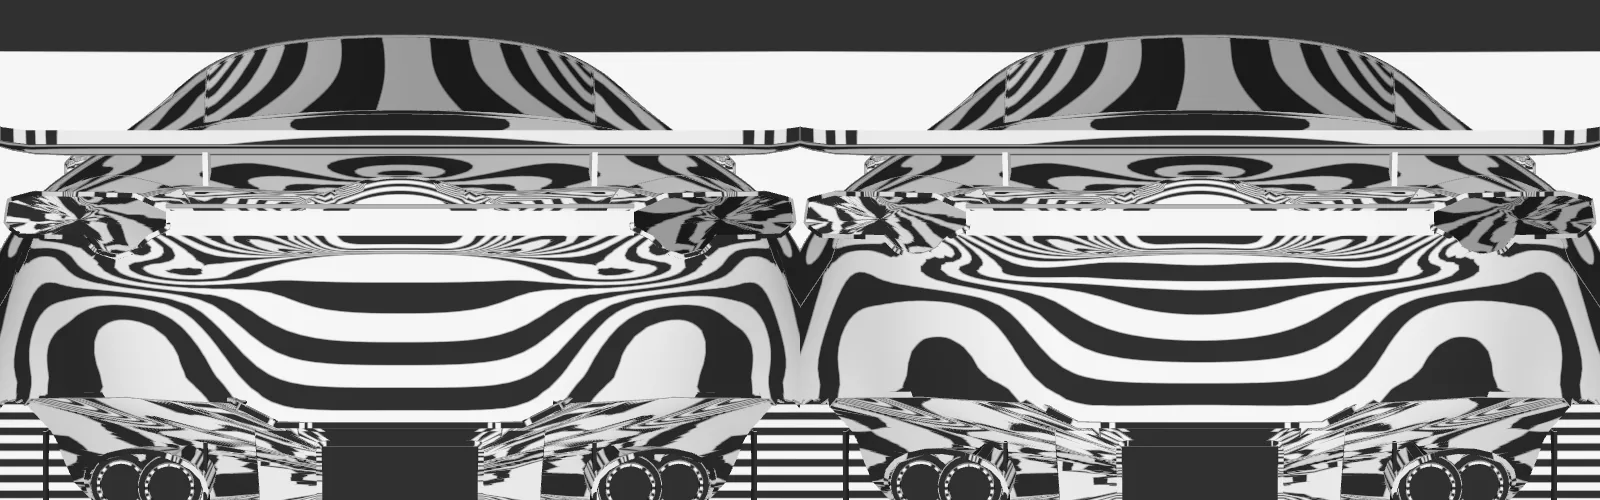
How to read it: smooth, evenly spaced bands mean a good surface. Bands that suddenly bunch up mean the surface bends sharply there. A wobble means a ripple. A band that jumps where two panels meet means they don't line up. Fix the worst spot, look again, repeat.
view_channel tool, channel zebra), or "take a zebra screenshot from the side" (screenshot with debug_view: 14). Then: "Compare the side of my car with the side picture" (compare_reference).When it matches from every side, make a model sheet (model_sheet: four sides of your model on one picture) and put it next to your views one last time.
The same method for everything else
- Characters: a turnaround sheet, then correct the engine render with Nano Banana, then a face sheet. The full walkthrough is in Nano Banana: characters.
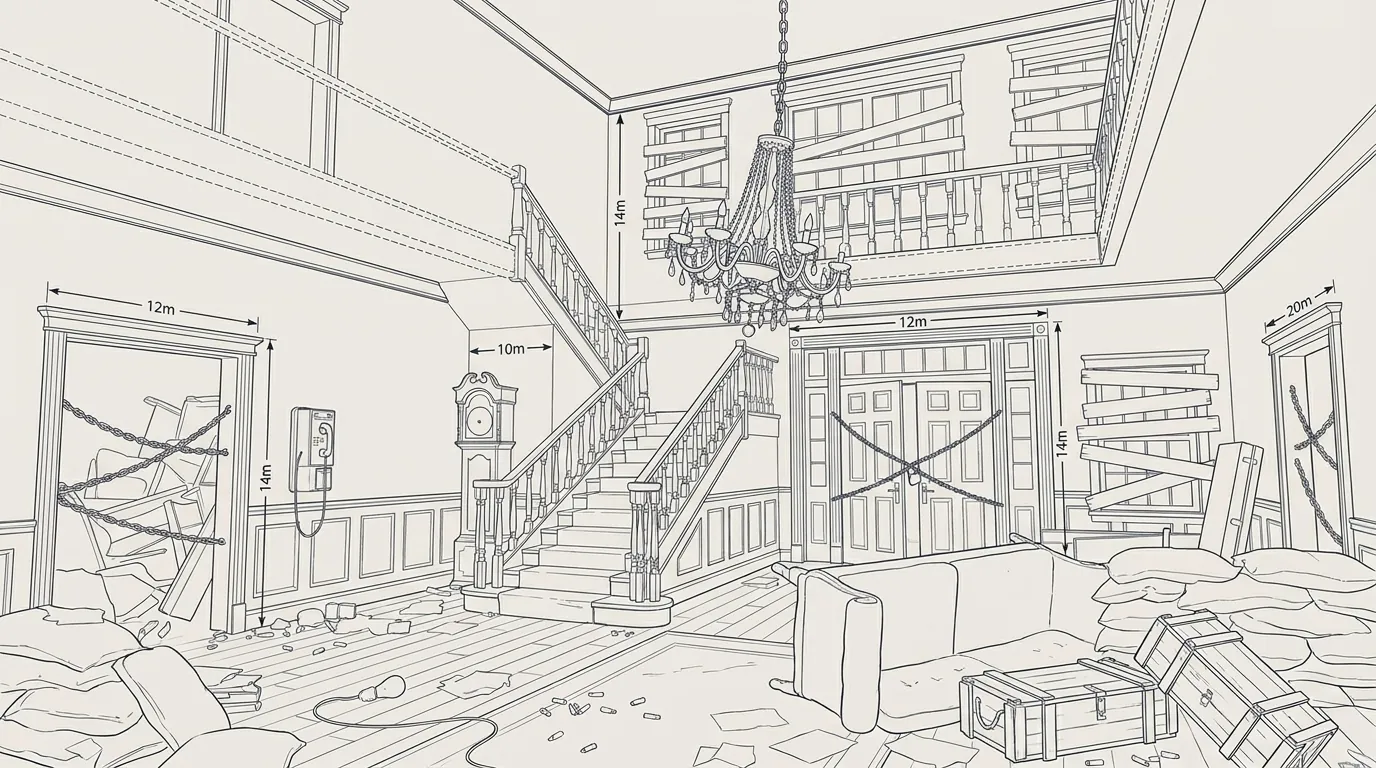
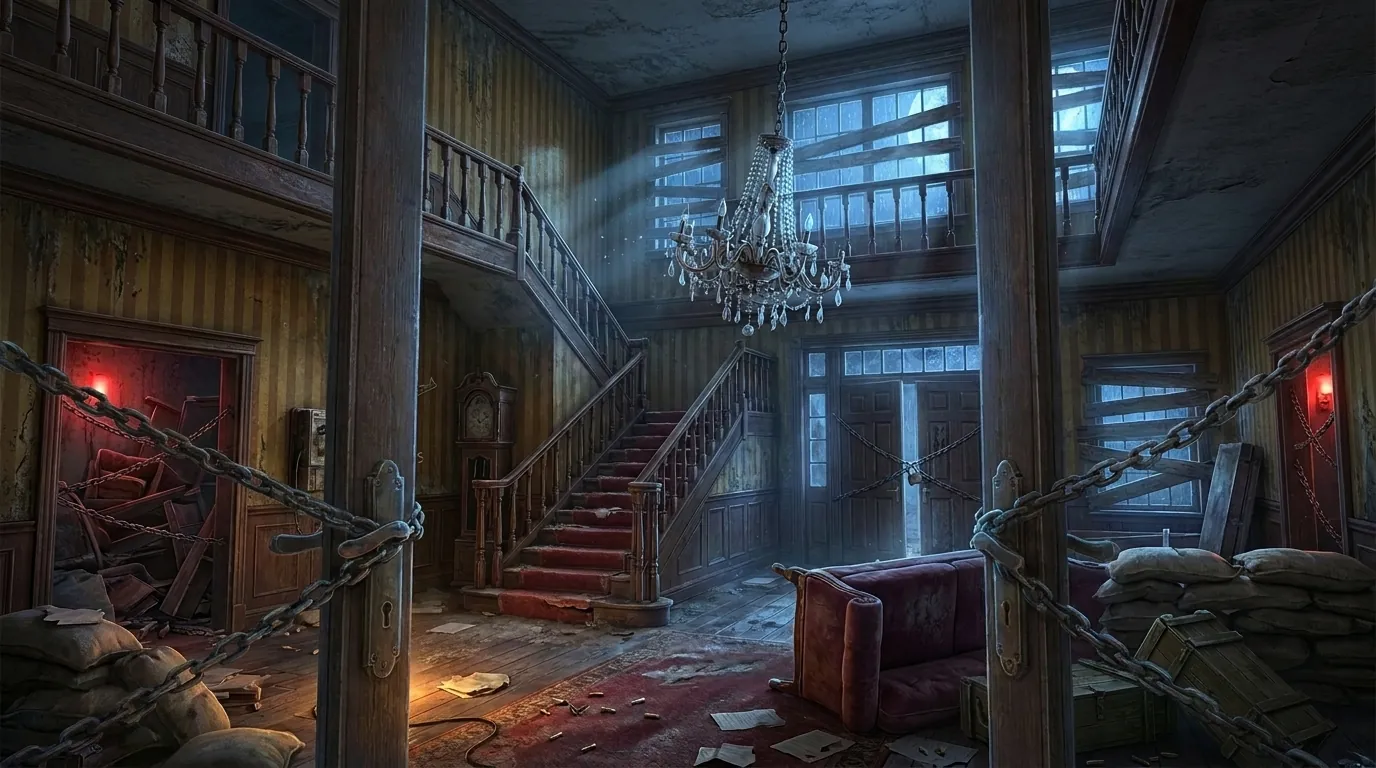
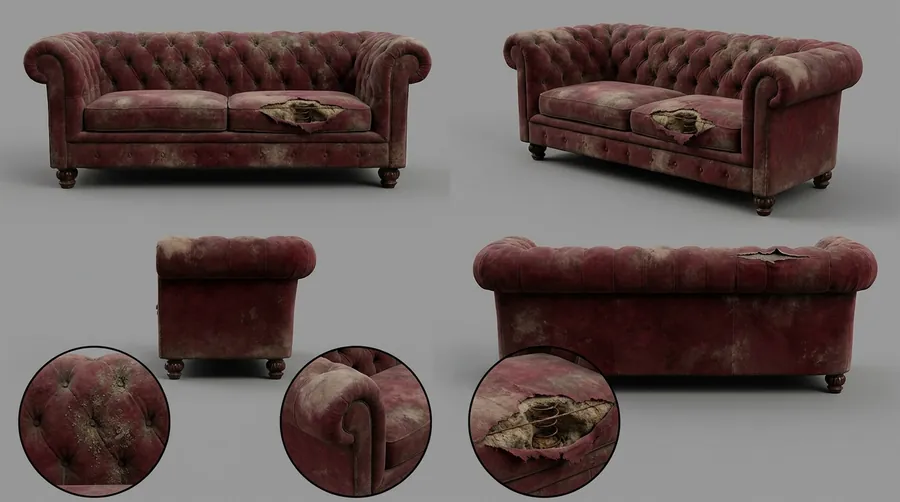
- Rooms and buildings: a measured floor plan first, then a picture of each room, then the furniture one piece at a time.
- Props: a sheet of four views on magenta, straight into
forge_from_views. - Light and mood: take a screenshot of your scene, ask Nano Banana to enhance it as a finished game shot, and use that as the target for your lighting.
- 2D games: sprite sheets on a magenta background go in through
art2d_import_reviewandimport_sprites. See Importing 2D sprite sheets.
The rules that make it work
- Picture first. Make the picture before you build anything. If you build from your head, it shows.
- Attach everything. Every new picture is an edit with all the earlier pictures attached.
- One change per edit. Change one thing, keep everything else the same, say so in the prompt.
- Check the picture. Count the parts, check both sides match, zoom in for writing and logos.
- Pick the truth. When views disagree, choose which ones are right and scale the rest.
- Real size. Give every model its real size, and use a checker card in close-ups.
- Shape, not stickers. Details are geometry. Pictures are the plan.
- Check from every side. Side by side, silhouettes, zebra. Then fix the worst thing and check again.